Keepsake Organization Part III: DIY Family Memory Boxes

Last on my list for organization projects to kick off 2024 (along with family yearbooks and file boxes for each child) was finding a good storage place for some of our most special family keepsakes. Our wedding memorabilia, mementos from our dating and newlywed years, and our family’s small keepsakes and loose photos all needed a home, and this set of archival storage boxes is perfect!

I got this idea from listening to Nancy Ray’s Work and Play podcast. She’s a former wedding photographer and a huge advocate for treating your family’s photos (professional photos, camera photos and iPhone photos alike) as what they truly are – your family’s legacy. Her approach inspired my giant personal photo overhaul, changing the way I approach, manage and store our family’s digital photos, but she also encourages safekeeping of printed photos and tangible memories. Her Legacy Photo System involves five boxes, but that was a little much for our family’s needs. Two is perfect for us now, and we can always get more if we need to.

These acid-free archival boxes with metal-reinforced sides prevent photos and papers from damage and from yellowing over time and while they’re obviously not fireproof or waterproof, they’re lightweight and an easy-to-access place to store things for generations.

As I was gathering photos from various places to put in these boxes, I realized that most of them have the file name and/or year they were printed in fine print on the back; however, that info isn’t really helpful if it doesn’t match up with when the photo was actually taken.

So I took a sharpie and wrote helpful information on the back of each one – date taken, ages, event if applicable. It made this project take a lot longer, but I know I’ll be glad I have those notes in many years when my memory gets fuzzy. You think you’ll remember, but I could barely remember things about photos that were taken 5 or 10 years ago, so I know it’ll only get harder!

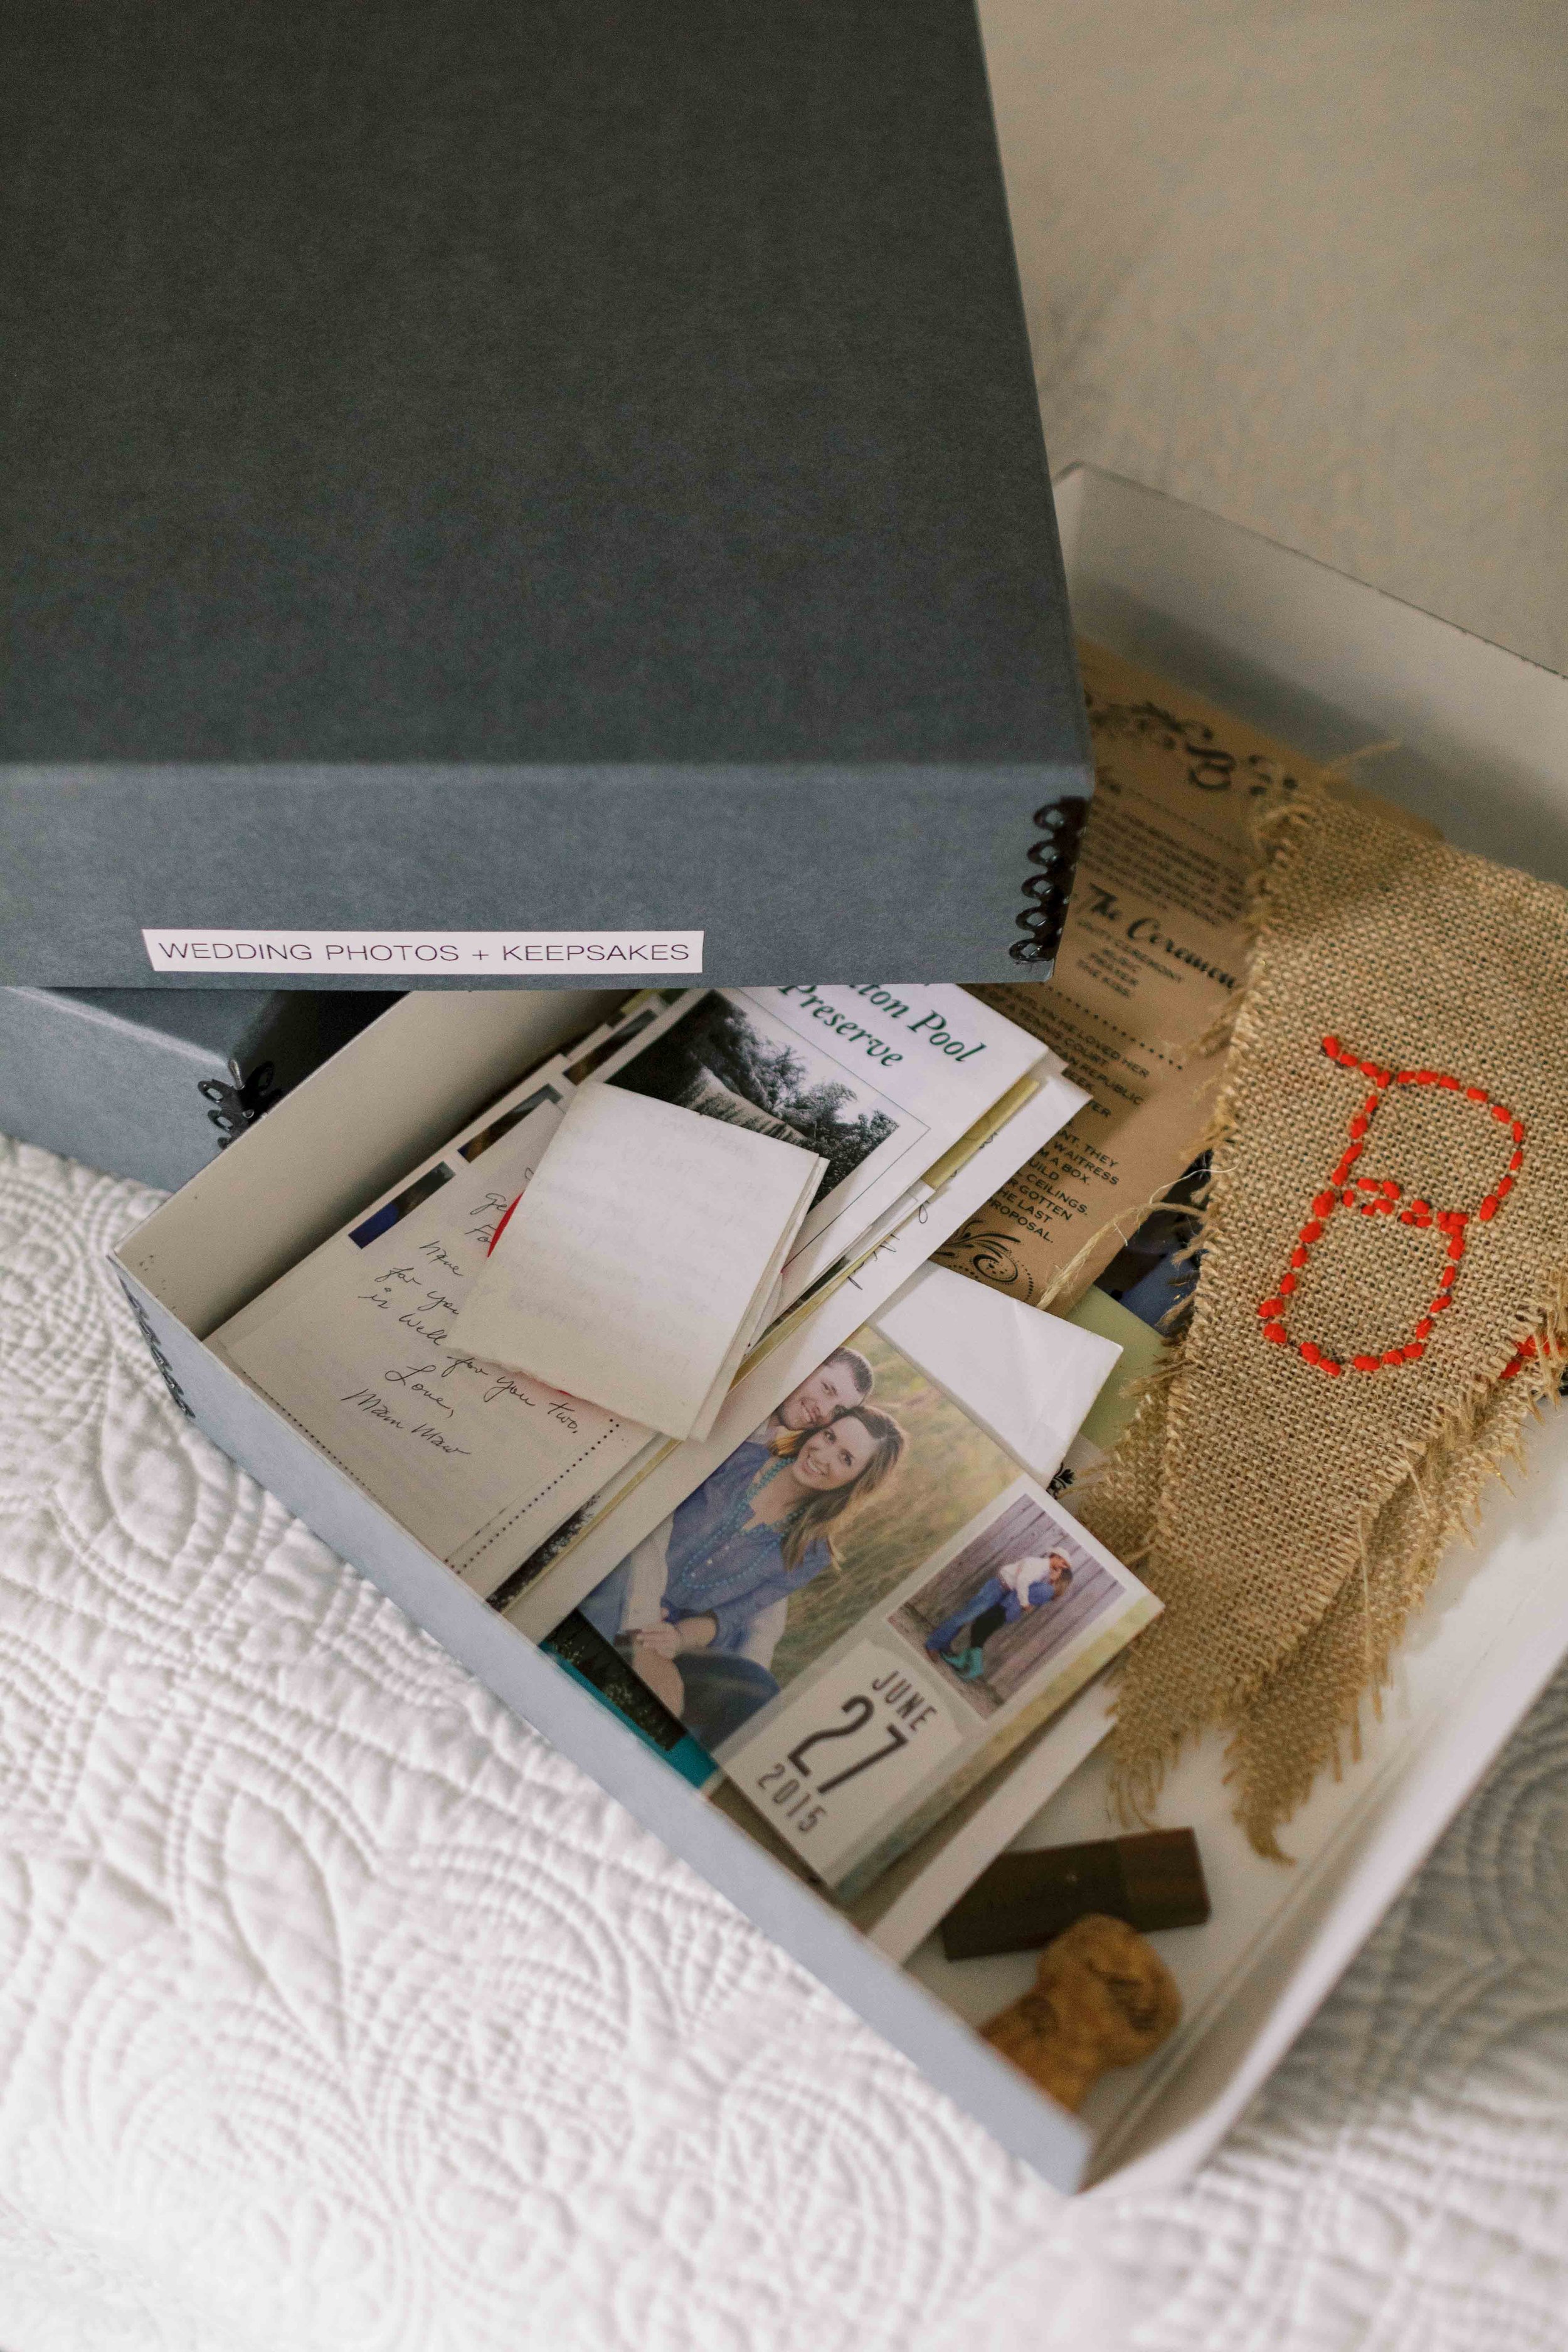
In our wedding box, I put our save the date, stationery from our wedding, letters we wrote to each other, mementos from the day we got engaged, a handmade banner my then-7-year-old cousin sewed for us, the USB with our wedding photos, and all of our loose printed photos from our wedding. Essentially, anything pre-children goes in this box.

Our family box will house all of our printed family photos that aren’t in our yearbooks or in frames, along with any other small mementos from trips or events that we want to hang onto over the years.

The cut sides on these boxes are on purpose, in case you want to slide out something on the bottom out from the side instead of having to pick everything up. Shop these exact archival boxes HERE or via the widget below – I did the 2-pack, size 11”x15”x3”, which will hold years and years’ worth of photos for us, even 11x14 prints.

This was one more of those projects that allowed me to breathe a deep sigh of relief once I finished. The peace of mind from having these precious keepsakes organized, easy to access and in a safe place – it’s priceless!

Keepsake Organization Part I: Family Yearbooks

What a labor of love and a long time coming. Our family yearbooks are finally here! I set out to make these happen a few years ago after seeing my friend Melanie share hers, but I knew I needed to get caught up after doing a complete overhaul of my digital + iPhone photo organization, changing my mindset around taking photos of my children, and really getting serious about those photos being our family’s legacy – not just taking up space on my phone.

Twenty years from now, our kids won’t be scrolling through our phones to revisit their childhood memories. We NEED tangible memories – and to narrow it down so they’re not burdened with an overload of photos.

I cover all the details of how I manage and store my personal photos on this blog, so I won’t go into too much detail here, but part of my system includes copying my iPhone photos onto my external hard drive (and a backup drive and the cloud) at least once a month. As I’m doing that, I go ahead and pick some favorites from that set of photos to save for our annual yearbook. This makes it super easy at the end of the year because we already have our very favorites saved and ready to go.

Why I Chose mPix for Our Family Yearbooks

After lots of research and even starting an account to test things out on four different websites (Artifact Uprising, Milk Books, Blurb, and mPix), I ended up choosing mPix to create our yearbooks. Artifact Uprising’s products are gorgeous but a book the same size and same number of pages was more than twice the cost of mPix. I also very much preferred mPix’s layout options and the ease of their drag and drop features over any of the others.

TIP: If you do an mPix book and want the most easily customizable pages, choose “Empty Page” as you’re building out your spreads, then drag and drop the photos you want onto that page, then change the layout if needed. Way faster!

Product Information for our MPix Family yearbooks

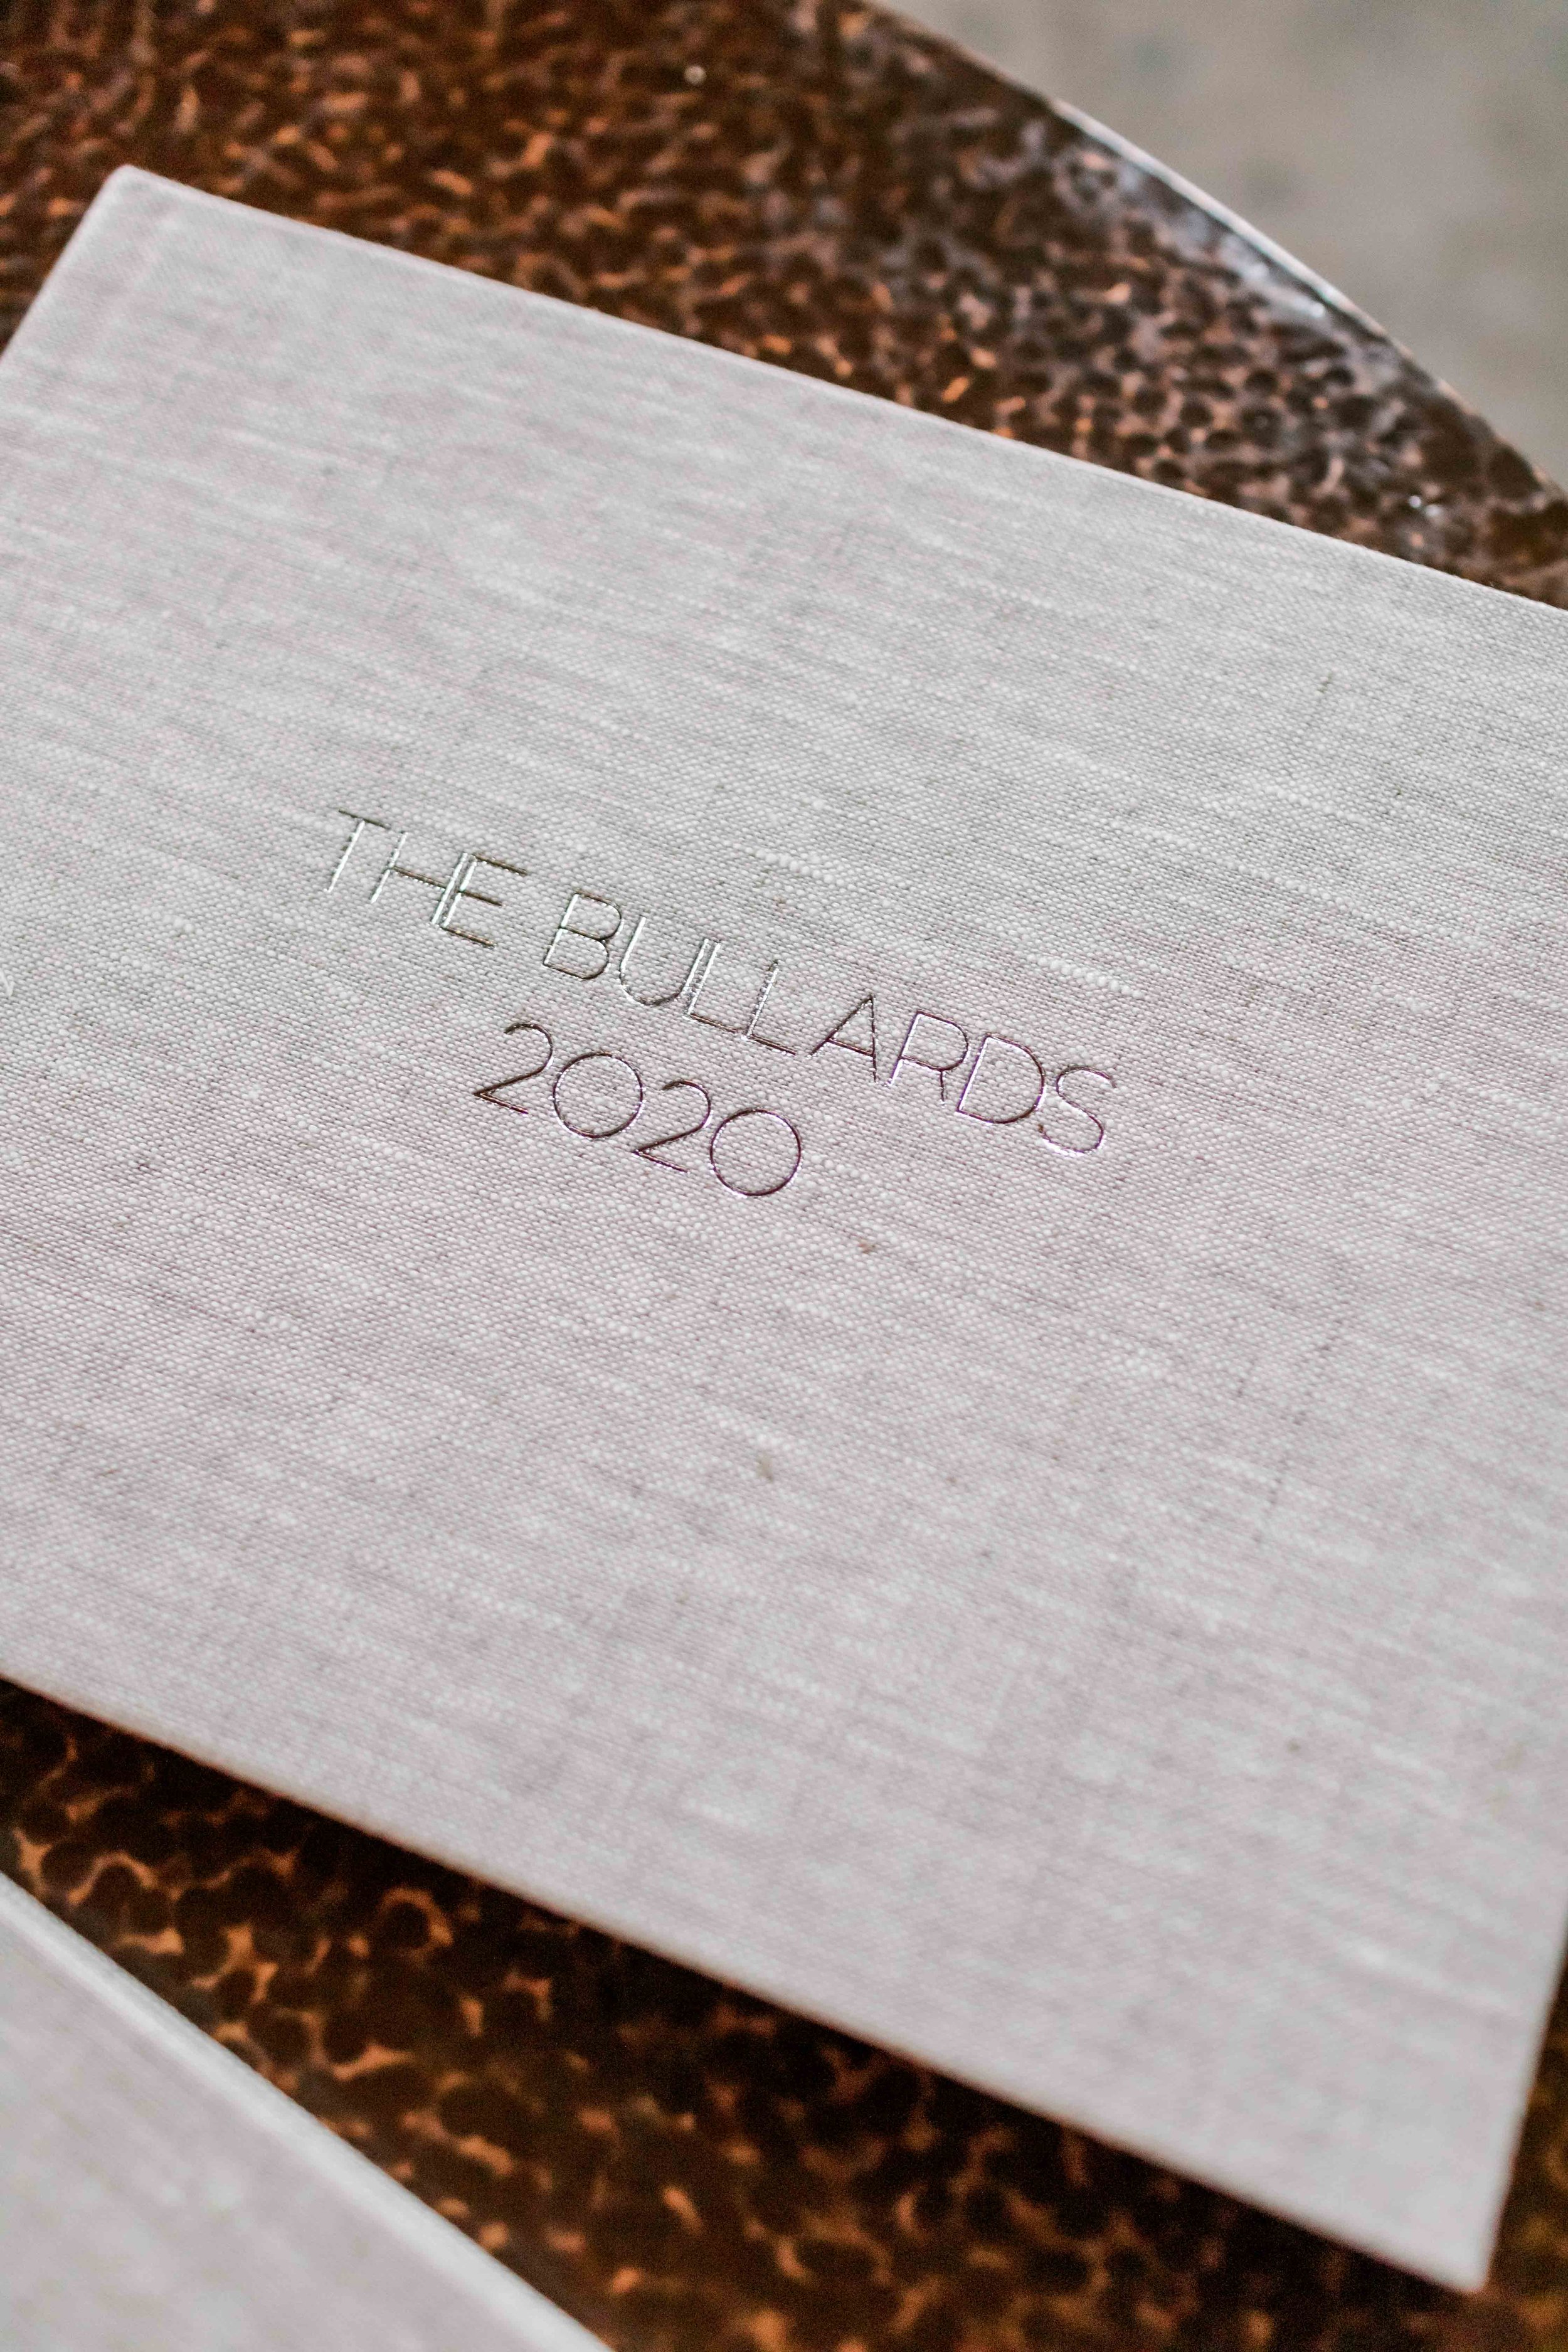
I went with the 11x8.5” Premium Linen Hardcover photo book, in the color Sand, with silver foil debossing on the front cover, and a dust jacket. I really would’ve preferred our last name and year foil stamped on the spine itself, but that option was super hard to find on any website in my price range. I ended up loving the dust jackets anyway! I chose a photo from the beginning-ish and end-ish of each year.

Doing a landscape layout meant I could fit more portrait-oriented photos on each page, plenty big but still with plenty of white space so it’s not too overwhelming. I did 3-6 photos per page for the most part.

These books come with 20 pages – ours ended up with 35-45 pages each (about 250 photos per year), so the extra pages, plus debossing and dust jackets made them about $120 a piece. I think these are WELL worth the cost. The quality is incredible – the cover is gorgeous and the matte pages are beautifully printed on sturdy cardstock. Plus, mPix usually runs a 40% off sale sometime in January, or you can get 25% off your first order any time.

Helpful tips for creating family yearbooks

Double check that whichever website you’re using has an auto-save feature and if not, save your work after each page – mPix does not have auto-save and I learned that the hard way, unfortunately!

Beware of issues with HEIC images (what your iPhone probably defaults to). None of the websites I tried accept HEIC photos, so you’ll have to convert to JPEG (use this website to convert several at once, or you can open one in Preview on a Mac and Export it as a JPEG). HOWEVER – when you convert from HEIC to JPEG, the image loses its original date taken info, so keeping things in chronological order was a complete mess. From now on, I’ve changed my phone settings to capture everything in JPEG (Settings, Camera, Formats, Most Compatible).

Another tip – make a Shared Album with your spouse to house your favorites/best of the best, so their favorites from their phone get included. I’d been keeping track of my favorites all along but getting caught up on five years’ worth of books meant Andrew had to go back and look through five years of photos on his phone and pick out his favorites, too. Having him put them in our Shared Album will make things easier from now on.

We’ll also do a Shared Album for videos that’ll make our yearly family movies even easier, too. For these, I just drag and drop all of our videos from each year into iMovie and it automatically puts them in the right order and makes a compilation. No transitions, no fancy editing, just all of our favorite videos from the year strung together to make one long movie. It’s so easy but such a treasure!

Thoughts on Quality over Quantity

Honestly, I haven’t been taking as many photos of my kids these days. They’re little busybodies, and while I want to remember these days, I also want to cherish them as they’re happening and not have my phone or my big camera in their face constantly. I took about 650 total photos and videos on my phone in 2023 and about 1000 in 2024 – there’s no magic number, but narrowing down 250 favorites from those was tough enough, and we still ended up with beautiful yearbooks full of photos that make us smile.

No Matter What – Print your Photos

These yearbooks are incredibly special to us and I know will be cherished for a lifetime, and hopefully beyond. Whatever you do, no matter how you choose to do it, whether it’s monthly Chatbooks, big yearly albums, a combination of both, or even just regularly printing 4x6s of your favorite iPhone photos and putting them in an old-school album – print your photos. It’s so worth it!

How I Manage + Organize My Digital and iPhone Photos

Consider this a sequel to my post on Living with Less and Prioritizing Simplicity in our Home. This time, we’re talking all things digital photos! After doing a giant organizational overhaul of our home and the things in it over the last couple of years, I still felt like I didn’t have a handle on our personal photos. I’ve always kept my clients’ photos organized, with systems in place for culling, storing, and backing up securely, but I couldn’t say the same for my personal photos. The number of Recents just sitting on my phone was in the thousands, and I know I’m not alone there.

As a photographer, of course I value professional photos. They’re artful, intentional, and they help me to remember certain seasons in a really beautiful light. I like to record things for our family with my big camera, too. But iPhone photos can be just as important - the little day to day moments, the funny videos, the vacation memories. They all hold extreme value.

Just like I prefaced the first blog, let me say again – a lot of this might sound harsh or extreme. It’s taken some perspective shifts and lightbulb moments to change some hard-wired habits and ways of thinking. Just like clothes and belongings, I get the attachment to photos and the anxiety/worry/guilt that comes with trying to pare them down. I get it. Your memories are yours alone and what’s important to you is important to you for a reason. So again, this is what’s currently working for me. If something’s helpful to you, great! If not, keep on keepin on.

The WHY Behind My Digital Photo Overhaul

It’s funny to look back and think about our own childhood photos. My mom was great at keeping photo albums and I loved flipping through them, but those albums held dozens, maybe a hundred. Certainly not thousands upon thousands of photos.

Now, we (80s and 90s babies) are parents to the most photographed generation in history. But what purpose is that actually serving? At what point does the sheer number of photos outweigh the benefit of keeping them all? Snapping photos has become almost a comfort thing for us in some ways. We think I HAVE TO CAPTURE THIS RIGHT NOW OR I’LL REGRET IT, instead of allowing ourselves to be fully present and then letting the moment pass on by. But do we lose some of the meaning, the intention, the value of a memory captured if it’s just floating around in a sea of tens of thousands of other memories captured? It sure becomes harder for memories to stand out and be appreciated…

I think some of us are scarred by the lack of tangible memories and sad that we don’t have more pictures from our own childhood. Which is understandable. But the challenge is this: you don’t have to overcompensate for that when it comes to your kids. I actually kind of appreciate the 90s way of NOT having every single little moment captured and saved. There’s gotta be a happy medium that exists between a lack of childhood memories captured on camera, and way too freaking many.

The number of photos on your phone is only going to increase. If your kids are little and it’s already at 5,000, 10,000, 20,000 - what’s it going to be at when they’re in high school? And beyond that? There is no physical way we can go back through and enjoy and relive 100,000, 500,000, a million photos some day down the road. It’s just not feasible. Even if we just wanted to look through a few at a time, or refer back to a certain memory, or photos from a certain season or event, how is that going to work if our photos aren’t organized? Are we going to just hope our iPhones still function the same and we can scroll back through 15 years’ worth of photos? That is a lot of scrolling.

I look at this as doing my future self and my children a favor. Not burdening them with more than they could ever possibly go through. Keeping only the best of the best. Keeping things manageable, for their sake. There’s a fine line between a lot to appreciate, and just plain overwhelming. Just like I’m not going to burden my kids with storage units worth of physical items to sort through one day, I’m not going to burden them with hundreds of thousands of photos, either.

the hardest part: culling

I’ve tried to make a habit of deleting iPhone photos as I go, culling through them daily or just right after I take a bunch. I also LOVE the strategy of using the search feature in the Photos app to search for the current date (ex. July 25) – it will show you every photo and video you’ve ever taken on July 25th of any year. Look through them, smile at some memories you forgot you captured, quickly decide which few are worth keeping, repeat. Doing a nightly cull is a good starting point for going back through and narrowing down/deleting photos from throughout the years, until you’re more caught up.

What does this look like? Blurry, awkward faces, closed eyes – gone. I don’t need 12 pictures if they all have a very similar pose or facial expression. If there are multiple people in a photo from a given event, one or two of that grouping is plenty. If I’m keeping a photo, there needs to be something distinctive about it. A good example every mom can relate to – taking the monthly pictures of your infant. Did you not take 27 pictures of them with the “4 months” sign? And 85 pictures with the “11 months” sign because they were rolling over or crawling off in half of them? I’d go back through those types of “bursts” of photos and narrow it down to literally just one or two (the horror, I know – but you can do this!). If it’s scenery, same thing. I don’t need 3 pictures of the same sunset or skyline, beautiful as it may be.

Distinctive is the keyword. Distinct poses, scenes, angles, facial expressions, actions being captured. 90s mindset. I try to think about it from a photographer’s perspective – the client only knows and cares about the photos you deliver, not the ones you delete. Your kids one day will not know or care about the okay photos you deleted – they’ll be able to better appreciate the good ones you kept.

It might take months on the front end to get things culled and at a more manageable number, but imagine the weight that’ll lift! Make a goal to have your number cut by a certain percentage by a certain date – a third by Christmas? Half by this time next year? And you’ll get to relive some memories as you go. Culling is the most time-intensive part. Beyond that, getting photos and videos off your phone and into folders every couple of months. once you’re caught up, takes minimal effort and time. 

off the phone, onto the external hard drive

A big influence for me in all of this is Nancy Ray – I listen to her podcast pretty often and have always heard her talk about her Legacy Photo System. She’s a former wedding photographer as well and has created an entire course about managing and organizing your family’s photos – your legacy! In her words, “Your phone is a phone. Not a storage device.” Yes, it has photo storage. Yes, iPhoto and iCloud are on it and that’s all fine. But phones get lost. They break. Do you really want to trust these memories to iCloud alone? Bottom line: when photos and videos are only on your phone, they’re not permanent.

To get them off my phone and stored safely, I use two hard drives: my main external hard drive, and a backup hard drive. I store very little on my actual computer because I don’t want it to get bogged down and run slower, so all of my client photos (and now personal photos too) are on an external hard drive. My backup hard drive’s only function is to create an exact copy of my external hard drive.

So to get photos and videos off my phone, I use Image Capture (comes standard on Macs, just search for it in the search bar). I plug my phone into my computer, open the program and it shows every photo and video on my phone (it’ll actually show an additional file copy if you’ve ever made edits to something). From there, I drag and drop into folders on my external. Each folder name starts with the year, then the month, then the event name. If there are multiple images from a particular event, that gets its own folder. Random one-off photos and videos can go in a seasonal folder, like 2023 Spring, 2023 Summer, etc. Here are some examples:

For something that spans multiple months (like Pregnancy – I wanted to keep all my ultrasound + bump pictures in one folder) I name the folder with whatever month it started.

After culling a tonnnnn of my kids’ baby pictures, I found it was easiest to group what was left, just day-to-day moments that don’t really fall under an event, into six-month increments: 0-6, 6-12, 12-18, 18-24 months. Beyond that, I do (Name) 2 Years Old, (Name) 3 Years Old, etc., for the miscellaneous photos and videos. For random family photos, scenery, a picture from a random date night, things like that, I do seasonal folders for each year - Spring, Summer, Fall, Winter.

Phone Settings

I realized as I started using Image Capture that having Live Photo turned on was creating more work in the long run for me, so I turned it off – controversial, I know. Yes, it’s fun to watch Lives back, but when you import a Live Photo with Image Capture it automatically creates a photo AND video version of the file and that’s just not worth the extra culling effort or file space for me. I tend to use Portrait Mode most of the time anyway.

Also, after realizing my iPhone photos were importing as HEIC files vs. JPEG, I did some research on what’s best. HEIC files retain the same quality at about half the file size of JPEG, and both types can be edited in Lightroom. However, after starting the album creation process and running into compatibility issues with the printing companies and album software, converting HEICs to JPEGs became too much of a hassle, so JPEG it is for me.

Backing up my photos securely

Getting a quality external hard drive is important, but even the sturdiest external drive isn’t made to last forever. From personal experience and hearing from other photographers, it seems like 5-ish years is a normal life expectancy for these things. Which means having your photos backed up in multiple places is IMPORTANT.

My backup hard drive runs with Time Machine to create a copy of what’s on my external, and I keep it in our fire-proof safe when it’s not plugged in. On my phone, I have the Amazon Photos app, which constantly backs up new photos (not videos, but if you have Prime, it’s free to back up unlimited photos, so it’s silly not to take advantage.)

Beyond that, I knew it was worth paying for some sort of reliable cloud storage to protect these memories – as dramatic as it sounds, it’s our family’s legacy at stake. I’ve never liked iCloud, so paying for more storage there wasn’t an option for me. Dropbox is a good alternative and is what Nancy Ray uses - its base plan is $119 a year for 2TB, but I didn’t need quite that much space. I have about 6,000 total photos and videos right now (1200 of those are our wedding photos) for a total of 55GB. Google One (what they now call all your storage across Gmail, Google Drive, Google Photos, etc.) has a 200GB option for $29 a year, which is perfect for me. Honestly, I think Google Photos sucks as much as iCloud and I deleted the app from my phone a while ago. BUT, I love the rest of the Google Suite’s integration enough to make up for it, and I like how Google Drive allows you to copy entire folders over from your computer and it keeps the same hierarchy. So Google Drive is where my photos are currently residing on the cloud!

But what about…

Accessibility? Does it bother you not being able to look at old photos on your phone?

Nope! Not an issue, because I still can! I’ll keep the current calendar year’s worth of photos and videos in my Recents folder on my phone, and if I want to look back at something else, I can easily find it on my Google Drive app. It’s all still there, organized into folders just like on my hard drive, it’s just not taking up storage space on my phone itself.

What about things like screenshots, quotes, recipes, etc.?

I did create a folder for those things within each year, however – screenshots are usually something I need to do something about. So as I’m culling, if it’s important enough to hang onto, I’ll either write it down on paper, copy it into my Notes app, email it to myself and file it within Gmail, or move that to-do item elsewhere.

How do you reconcile all this as a photographer? Don’t photographers advocate for MORE photos?

Obviously I’m a proponent of investing in professional photos for your family on a regular basis. There’s so much value in hiring someone to capture your entire family in an artful, timeless way. That said – it will always and forever be quality over quantity for me. It’s okay to only keep your very favorites from professional photo sessions. We cull your photos before we edit and deliver them to you - you’re allowed to cull even more! It’s our job to give you a gallery of what we feel is artful and beautiful. We’re providing you with options, and our goal for you is to really, truly enjoy your favorites. Maybe it’s the whole gallery! Maybe it’s half of them. Just like you do with your iPhone photos, decide which ones are most meaningful for you and your family’s legacy. Go for the ones that immediately make you feel something. Print them, frame them, put them in an album or family yearbook. It’s okay if you don’t hang onto the rest. 

My Goals from Here on Out

I’m planning to sit down and transfer photos from my phone to my computer once a month or as needed. Now that I’m caught up and culling daily, it’s really not too daunting of a task anymore to stay current.

A couple of years ago, before I even started this whole process, I started adding photos to Family Yearbook folders on my desktop. Like, the best of the best. Probably around 150-200 photos per year. I also created a Shared Album on my phone so my husband and I can both add our favorite iPhone photos that we want included in these yearbooks. At the end of this year, I finally got caught up creating those annual yearbooks for our family using mPix hardcover books. After trying out a few different options, I loved mPix’s customization features the best, but there are tons of great album companies depending on your preferences. Even an old school photo album with 4x6s of your iPhone photos is a great option! No matter what you choose, having your photos printed for your family to look back on and hold in their hands – there’s nothing better.

Something Andrew requested was a yearly family video, too. I finally caught up on 5 years’ worth of annual videos with iMovie and it was actually way easier than I expected! I just drag and drop my favorite video files and it can compile everything, in chronological order, into one continuous file. Nothing fancy, just all our favorite clips from the year combined into one long one, but so fun to look back on!

I also got archival storage boxes for our loose printed photos that aren’t in frames – one for our life pre-kids (dating/engagement/wedding/newlywed years) and one for our family memories.

Final thoughts

Just like with our home and downsizing our belongings, the mental load of managing all of it gets HEAVY. Getting to this point in downsizing our photos feels like a giant weight has been lifted. I feel like I can be much more present, enjoying the moments with my kids rather than having my phone in their face all the time. For the really important things (big life events, milestones, vacations, gatherings) I bring my big camera and leave my phone put away as much as possible, but when I do go to pull up the camera on my phone, I try to ask myself now “Am I taking this to share? Or am I taking it for us, to save?” It’s ok to take things for the purpose of sharing sometimes – we live in a connected world – but if it’s just for me and my family, I’m sure going to be more intentional about taking fewer but better photos. Quality over quantity.

Less, but better. That’s what I’m going for in all aspects of life in this season and it. is. freeing.


Thank you Maddie Ray for some of my very favorite family photos.

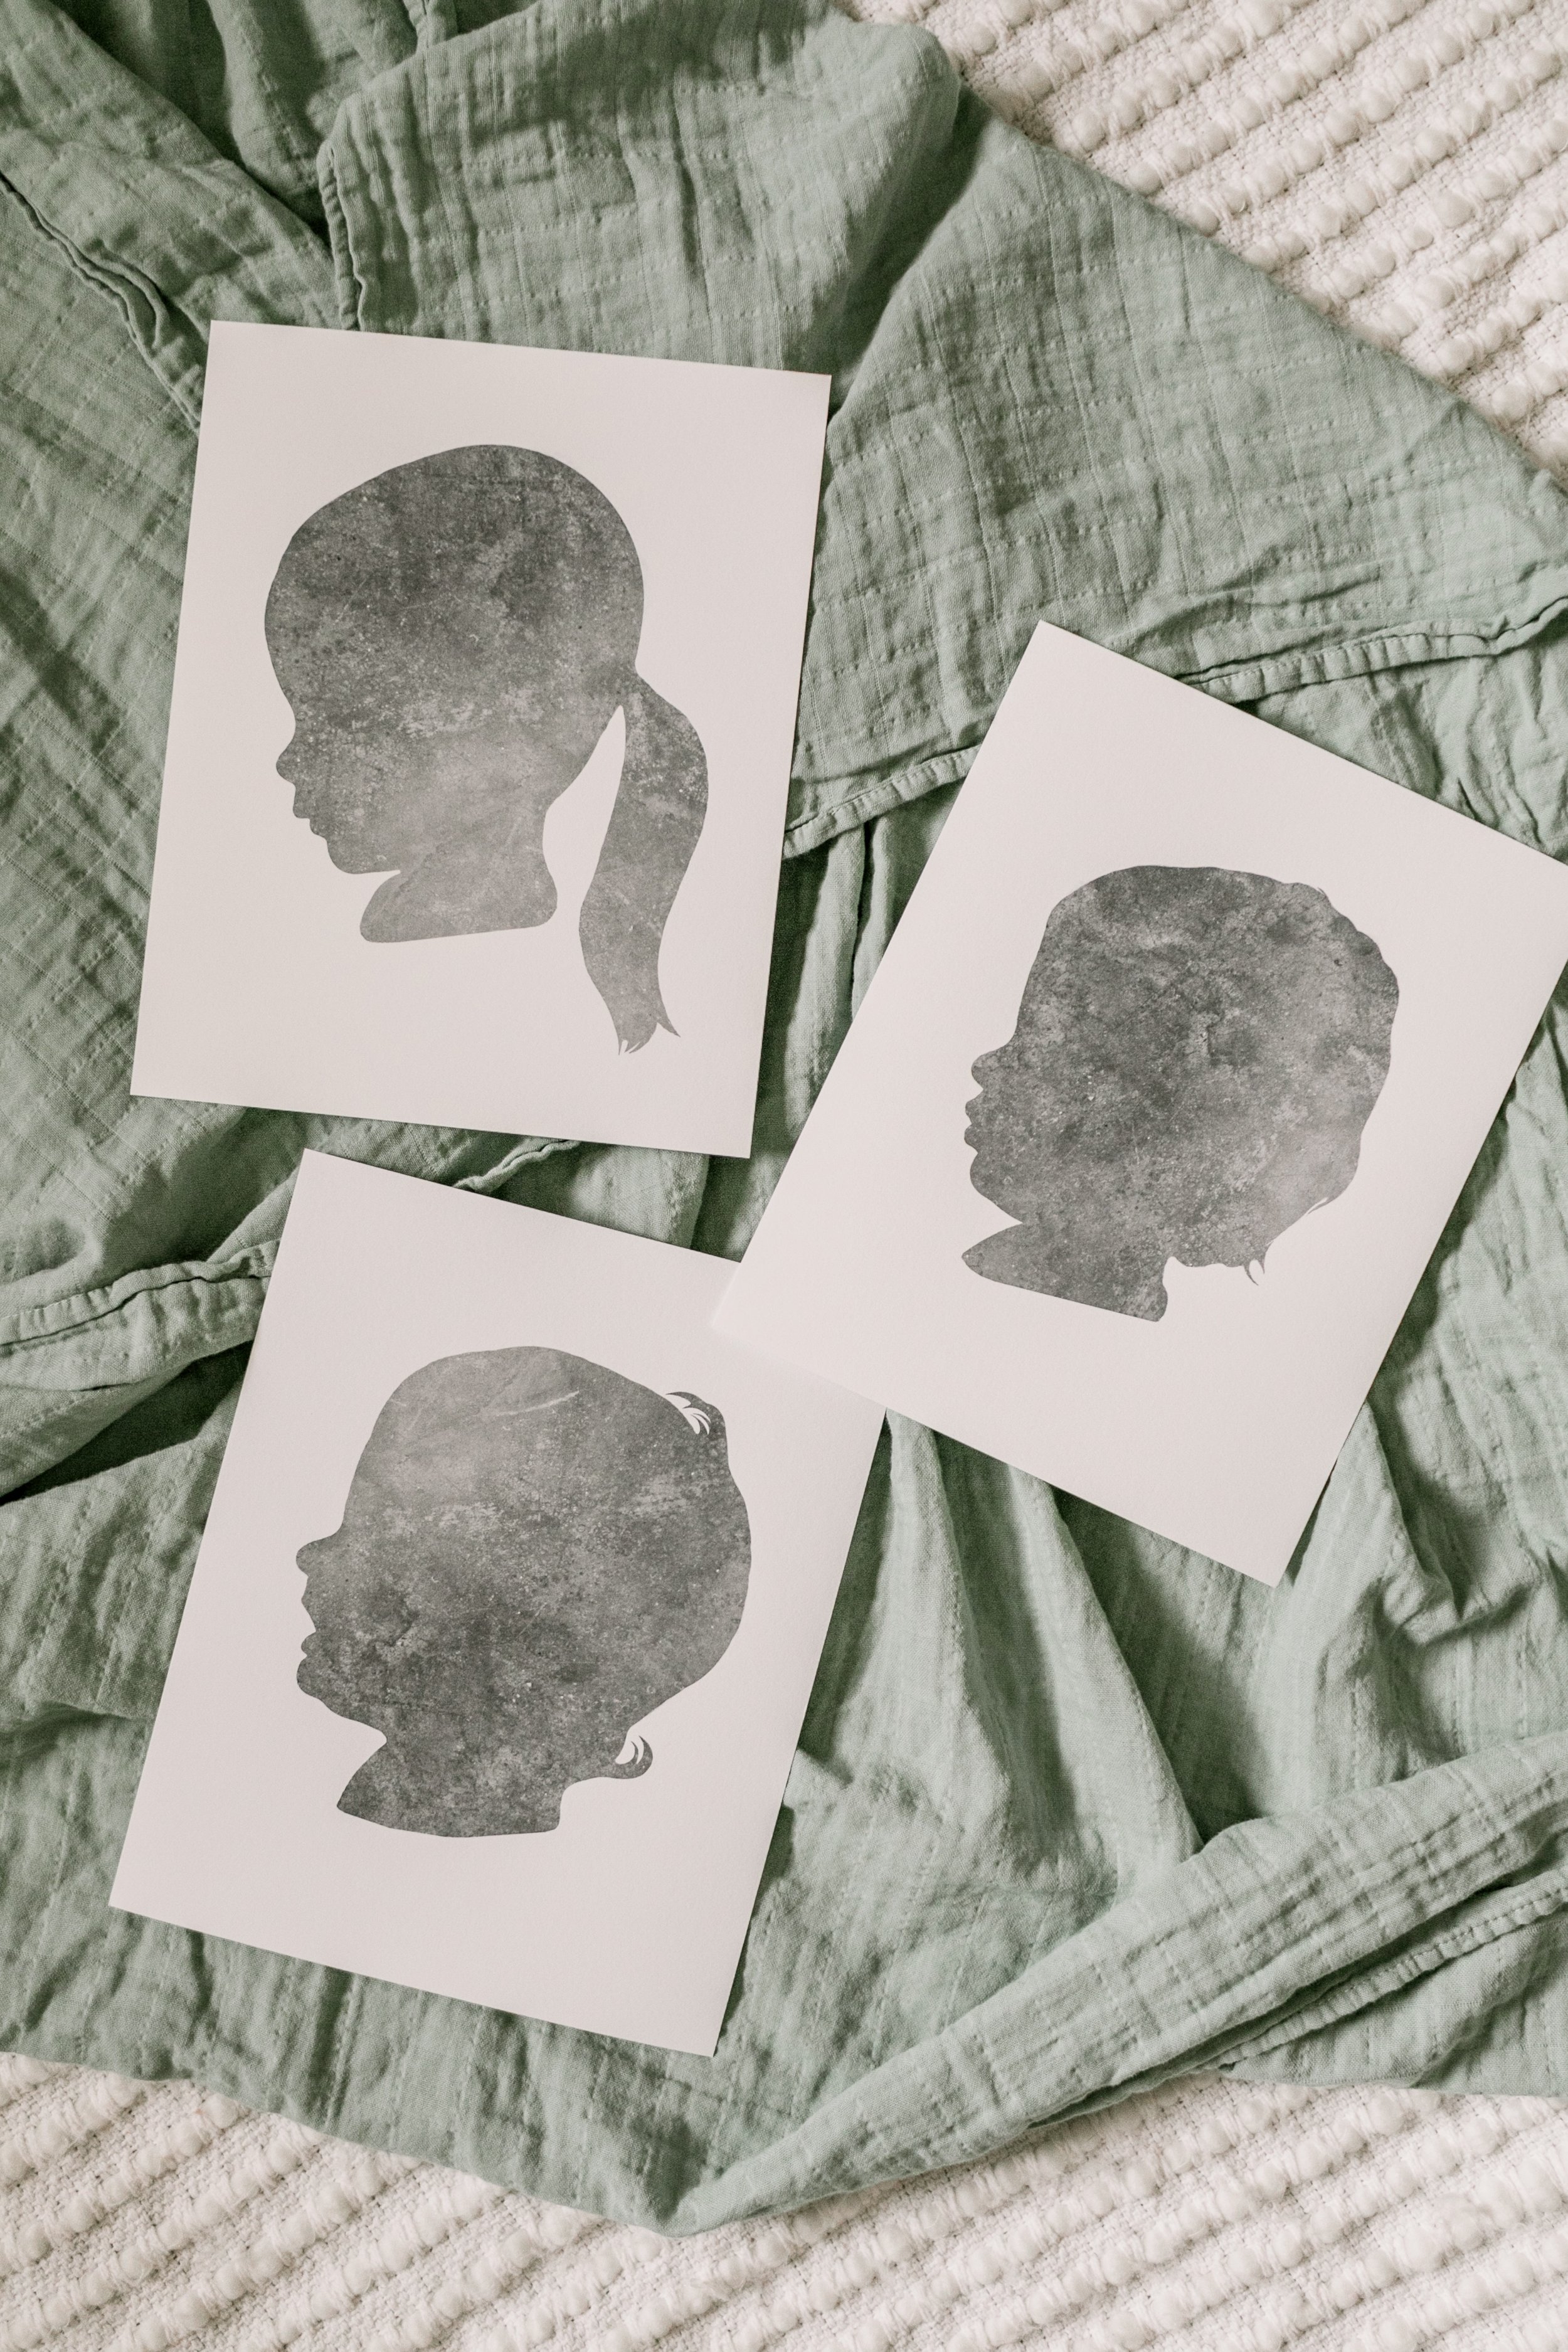
Why I Started Doing Silhouettes

I’ve added something new to my business in 2023… silhouettes!

It all started in January one day when something urged me to open and read a newsletter email I usually just skim over. In this email from Katie Lamb, an educational resource for photographers I’ve been subscribed to for a while, was a lesson on how to create silhouettes in Photoshop. I was intrigued by the photos she shared of the finished product of her own children’s silhouettes and thought it would be something fun to work on in the evenings, so I went through the lesson, made my toddlers stand in front of a blank wall to take pictures of their little profiles, and got to work. And I fell in love.

So much so that I messaged Katie and told her thank you for sticking such a GEM in her email newsletter and making such an impact. Working on these silhouettes of my own kids gave me the creative push I didn’t even know I needed to take some risks and try some new things with my business this year – and, bonus, I still get giddy every time I look at them. These will be treasured for decades to come and I knew I couldn’t keep these to myself!

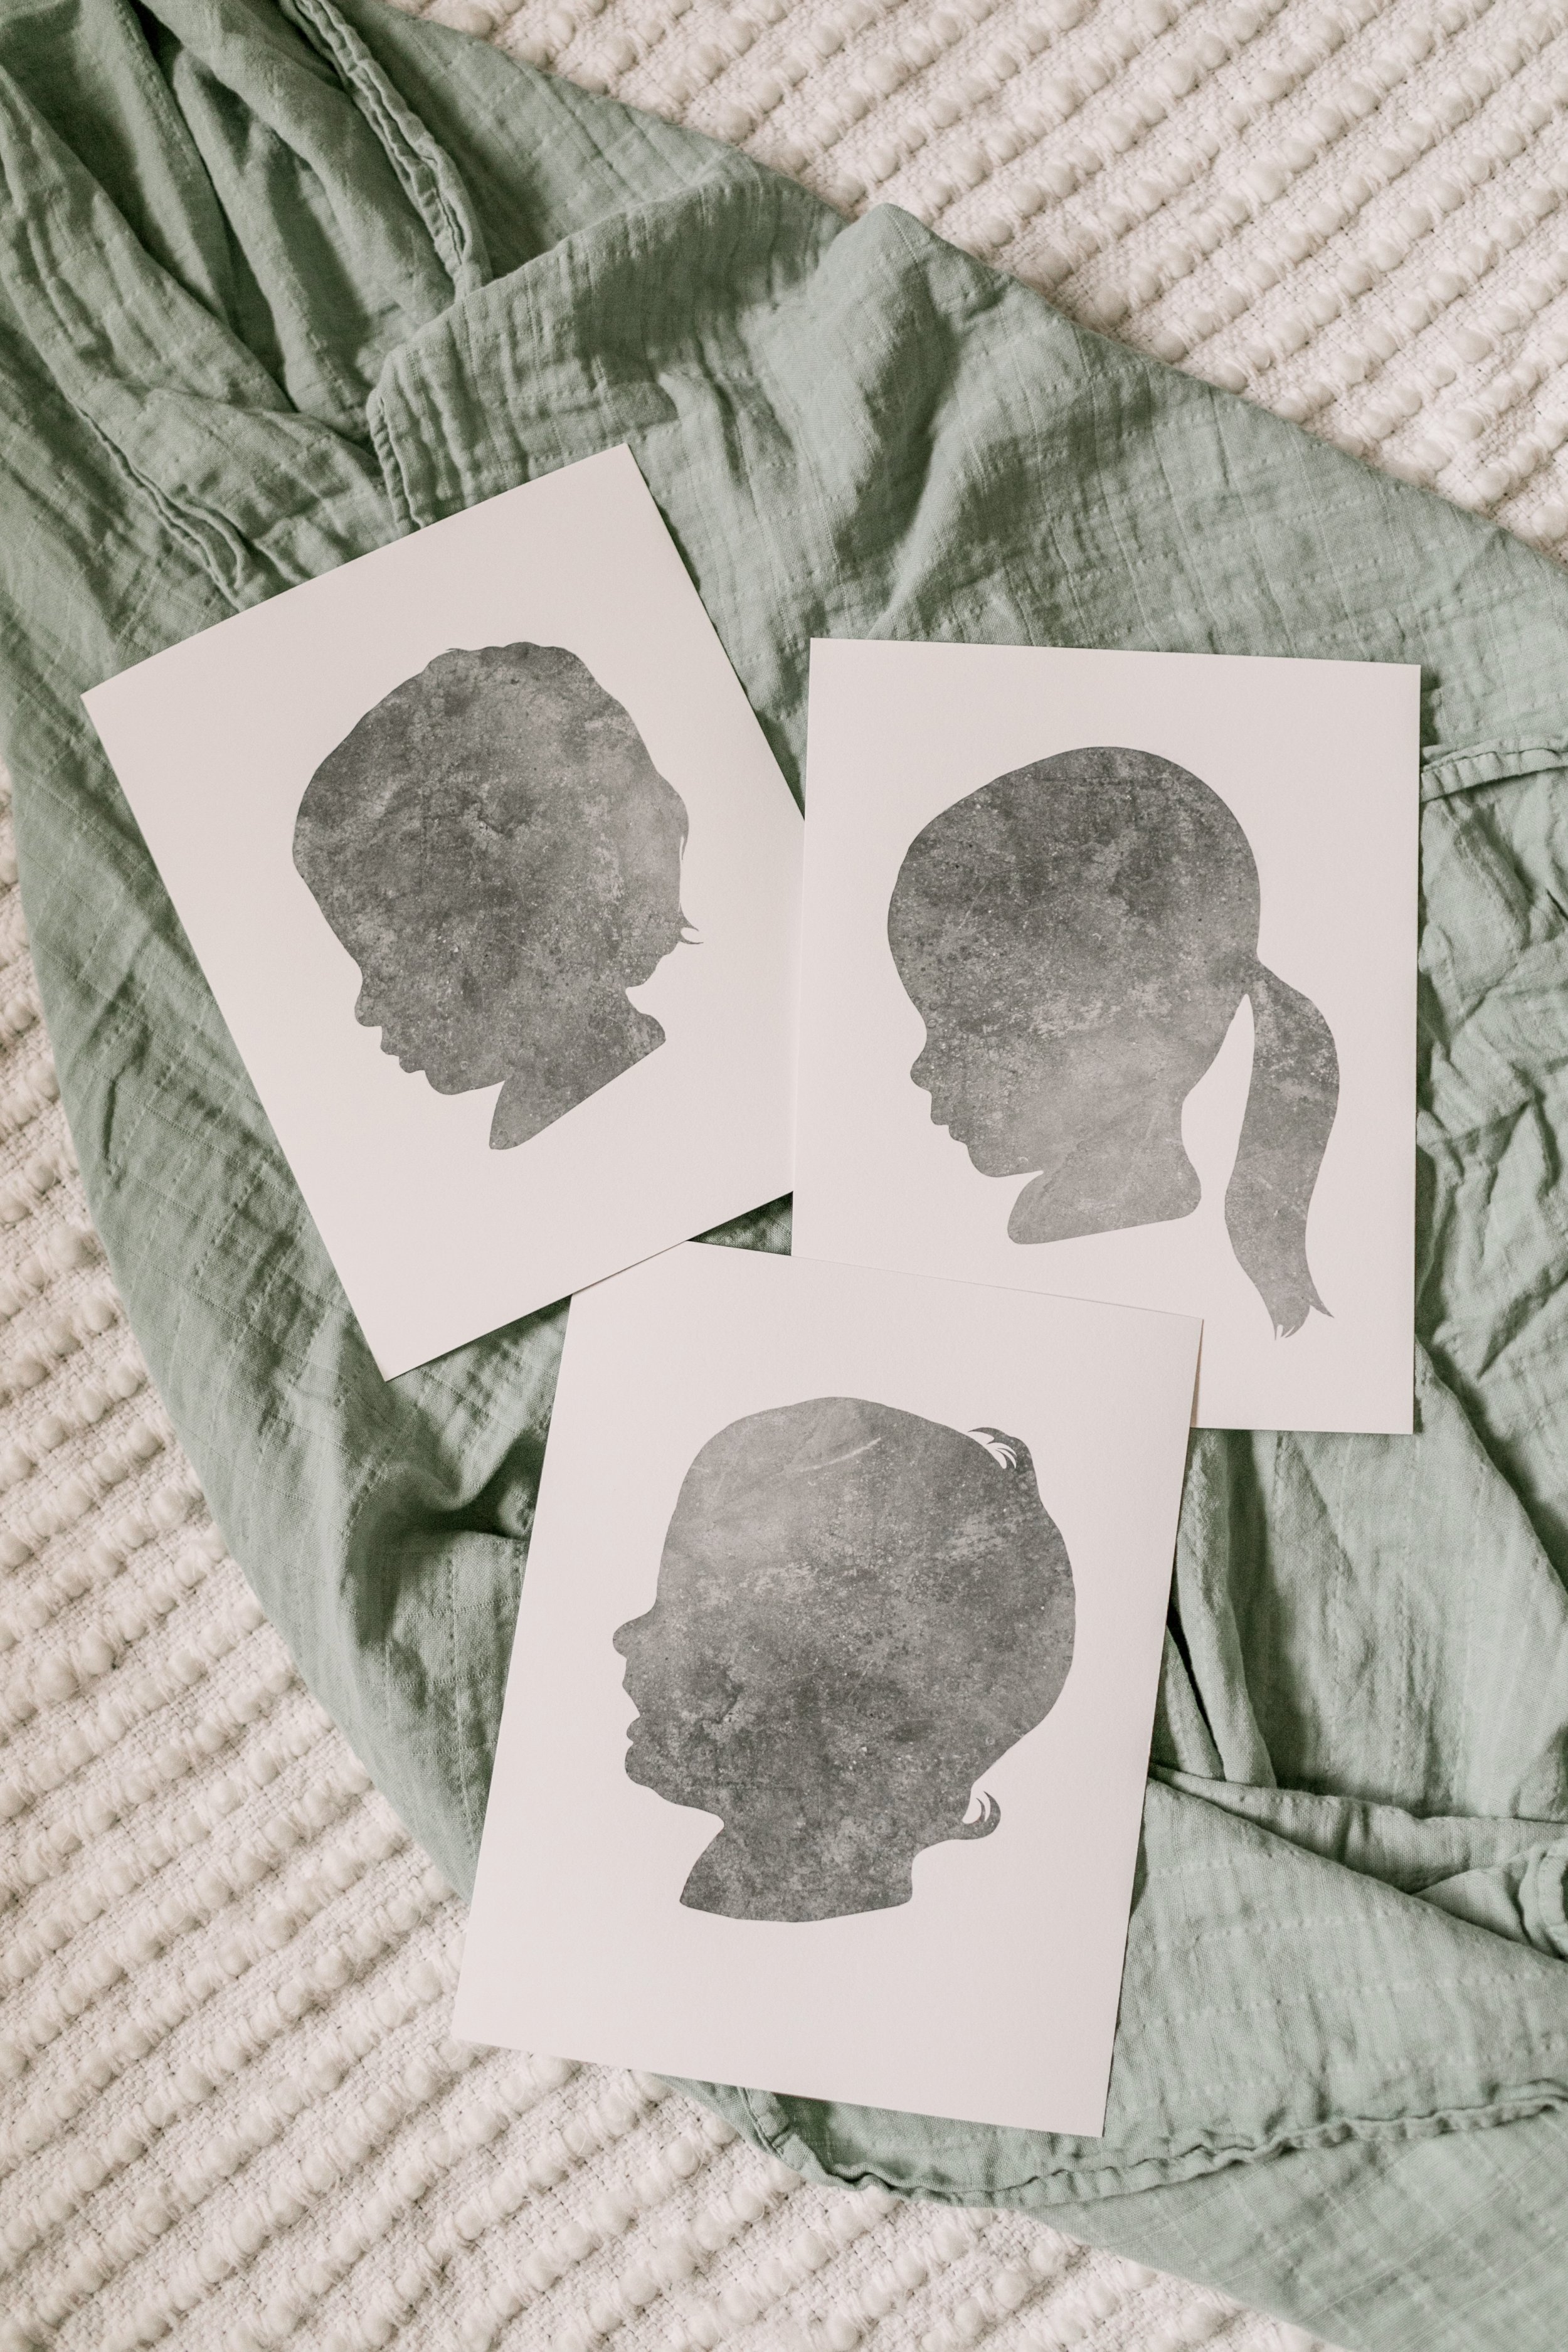
Something about your babies’ precious profiles frozen in time — bittersweet because it’s undeniably them, yet they won’t ever be this little again. Their nose, lips, cowlicks and curls — their disposition and demeanor — the essence of who they are, right here at this moment in time. A silhouette presses pause and helps you take it all in. I’m so thrilled to offer these to anyone, anywhere, who wants a keepsake to remember their babies in this way!

So naturally, I texted my close friends and asked if I could work out the kinks of my silhouette process with their little ones as my testers. These all started with iPhone pictures. I took a few weeks to really get my process down but I’ve made it super easy for you to order from anywhere! I’ll also be offering these as session add-ons, but they do not have to be done in person.

Why the concrete background instead of plain black? I chose this look for my signature silhouette style for a few reasons:

  • it’s still timeless and eye-catching without the harshness of black

  • it looks incredible on the textured fine art torchon paper these are printed on

  • mostly I just think it looks freaking cool.

These concrete background silhouettes are so special to me and it makes me ecstatic to be able to share them with you and your families, too. Head over to my Silhouettes page to learn more or to get the process started!